How to Repair Gutter Leaks Before They Worsen
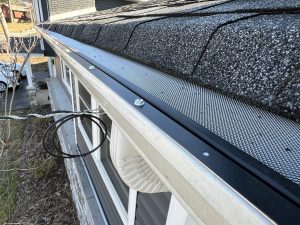
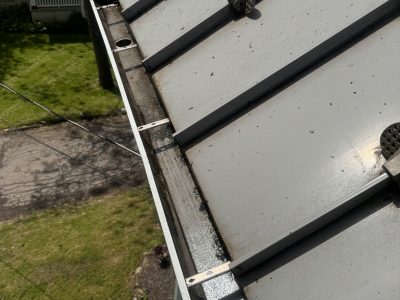

A leaking gutter rarely stays a small problem for long. At first, it looks harmless, maybe a thin drip from a joint or a dark streak down the fascia after a storm. Then the water starts finding easier paths. It runs behind the gutter instead of through it. It spots the soffit, stains siding, softens trim, and drops too close to the foundation. By the time a homeowner decides it is worth dealing with, the repair often costs more than it should have.
That is why gutter repair is best handled early, while the issue is still localized and the metal or vinyl has not deteriorated beyond a practical fix. In many cases, a leak can be stopped in an afternoon with basic tools, careful prep, and the right sealant. The trick is knowing what type of leak you are looking at, whether the gutter is still structurally sound, and where a simple patch ends and a replacement begins.
I have seen all versions of this problem, from pinhole leaks in older aluminum runs to end caps hanging on by a skin of failed caulk. The jobs that hold up over time usually share one thing: the person doing the repair did not just smear sealant over wet debris and hope for the best. Good gutter repair is mostly diagnosis and preparation. The patch itself is the easy part.
What causes gutter leaks in the first place
Most leaks come from wear, movement, or neglect. Gutters expand in heat and contract in cold. Hangers loosen. Debris sits damp in low spots. Sealants harden and separate after years of sun exposure. A branch brushing a front corner during wind can open a seam that was already weak.
The most common trouble spots are gutter joints, end caps, downspout connections, mitered corners, and rusted bottoms. Seams tend to leak first because every joint is a potential failure point. Sectional gutters are especially prone to this. Seamless gutters leak less often, but even they can fail where accessories connect or where the trough has been punctured by corrosion or screws.
Slope issues also get mistaken for leaks. A gutter that holds standing water for days may drip at the seam, but the seam is not always the root cause. Sometimes the real issue is pitch. If the run has sagged in the middle or was installed nearly flat, water remains in contact with seams longer than it should. In that case, resealing without correcting the alignment only buys time.
Start by figuring out where the water is escaping
Leaks are not always visible from the ground, and they do not always show themselves directly above the stain you notice on the wall. Water travels. It can wick along dirt and oxidation, then drop from a different point entirely. I have watched homeowners patch the wrong corner twice because the actual opening was eighteen inches upstream.
A dry-day inspection is easier and safer than trying to diagnose during rain. Set a stable extension ladder on firm ground, ideally with a helper footing it. Wear gloves because gutter edges can be sharp, especially on older aluminum. Clear out leaves and sediment before you look for defects. A gutter full of debris can hide cracks, trapped fasteners, and rust that would be obvious once the trough is clean.
After that, run water through the system with a garden hose. Start with a modest flow rather than blasting it at full pressure. Too much water too quickly can make every joint look worse than it is. Let the water move naturally toward the downspout and watch where drips form. Mark each suspect area with painter’s tape or a grease pencil so you can find it again after the gutter dries.
If you see water spilling over the front edge, that may not be a leak at all. The gutter could be clogged, undersized for the roof area, or pitched incorrectly. If you see water running behind the gutter, look at apron flashing, gutter placement relative to the drip edge, and whether the back edge has pulled away from the fascia.
When a leak can be repaired, and when it should not be
Not every gutter deserves a patch. If the metal is thin, perforated in several places, or pulling loose from rotten fascia, repairs become temporary at best. The same applies when multiple seams have failed along an aging system. There comes a point where continued patching costs more in time and risk than replacement.
A repair is usually worthwhile when the gutter body is solid, the leak is limited to one or two areas, and the run still has good shape. Aluminum gutters in decent condition often respond well to resealing. Vinyl can also be repaired, though extreme temperature swings make some repairs less durable. Steel gutters are trickier once rust has taken hold. Surface rust can sometimes be treated. Deep scaling and perforation usually mean the material has lost too much thickness.
I generally tell homeowners to think in terms of substrate quality. Sealant is not a structural material. It can bridge a seam or back a patch, but it cannot restore a gutter bottom that has turned soft and flaky from corrosion.
The tools and materials that actually help
You do not need a contractor’s van full of gear for basic gutter repair, but a few choices matter. The wrong sealant, especially cheap general-purpose caulk, often fails within a season.
- Stable extension ladder
- Work gloves, rags, and a stiff brush
- Putty knife or scraper
- Gutter sealant rated for exterior wet conditions
- Sheet metal patch material for larger holes
For aluminum gutters, a polyurethane or tripolymer gutter sealant usually performs better than brittle painter’s caulk or standard silicone meant for windows. Read the label. Some products are specifically made for gutters and flashing, and those are worth using. If you need a patch, thin aluminum flashing works well on aluminum gutters. Try to avoid mixing metals in a way that encourages corrosion over time.
A wire brush can be useful on rusty areas, but use it carefully. On old gutters, aggressive brushing can turn a weak spot into a hole. I prefer a scraper and stiff nylon brush for most cleanup, then a light pass with abrasive material only where necessary.
Preparation is where durable repairs are won
If there is one step people rush, it is surface preparation. They see the gap, squeeze in sealant, smooth it with a finger, and call it done. Then the patch lets go because it was applied over mud, oxidation, old loose caulk, or damp residue.
The repair area needs to be clean, sound, and as dry as conditions allow. Remove all leaves, granules, and sludge around the leak. Scrape away failed sealant until you reach material that is still bonded. Wipe the area with a rag. Some manufacturers allow application to slightly damp surfaces, but not all do, so follow the product directions instead of guessing.
If the leak is around a seam that has separated, look at whether the joint itself has shifted. A bead of sealant cannot compensate for parts that are physically misaligned or pulling apart under stress. In those cases, re-fastening or re-supporting the section may need to happen before sealing.
Temperature matters too. Many sealants apply and cure best in moderate weather. Very cold surfaces, direct blazing sun on hot metal, or heavy humidity can affect adhesion and cure time. If the weather is marginal, it is worth waiting a day rather than wasting the tube.
Repairing leaking seams and joints
Seam failures are the bread and butter of gutter repair. They often occur where two sections overlap, at inside or outside corners, or where an end cap was originally sealed.
Once the area is clean and dry, run a generous bead of gutter sealant along the inside of the seam, not just the outside edge. Press it firmly into the joint with a putty knife so it fills the gap rather than merely sitting on top. On wider joints, I like to seal slightly beyond the visible opening to account for tiny channels that water may follow.
For corner miters, pay attention to movement. Corners take stress from expansion, ladders leaning in the wrong place, and occasional branch impact. If the metal is bent open, reshape it gently before sealing. The goal is a supported seam with sealant as the water barrier, not sealant alone holding the geometry together.
End caps deserve special attention because they often leak in a way that mimics a gutter overflow. Water collects at the end of a run, then escapes through a pinhole or failed bond line. Clean the entire inside perimeter of the cap and reseal all around it rather than targeting the one spot where the drip appeared. In practice, if one part of that cap bond has failed, the rest is often not far behind.
Fixing holes and rusted spots
Small punctures can usually be sealed directly if the surrounding metal is still strong. Larger holes, especially anything more than a small nail-sized opening, should be patched.
Here is the basic sequence that gives the best odds of a lasting repair:
- Clean the damaged area thoroughly and remove rust, loose sealant, and debris.
- Dry the surface, then apply gutter sealant around the hole and slightly beyond it.
- Press a metal patch into the sealant, making sure it overlaps solid material on all sides.
- Cover the edges of the patch with another layer of sealant to shed water.
- Allow full cure time before exposing the repair to heavy flow if possible.
The patch should extend well past the damaged area. A tiny patch over a weak, thinned section often fails because the surrounding material continues to deteriorate. Think of it like repairing drywall over crumbling plaster. The patch is only as dependable as the surface carrying it.
On steel gutters with active rust, treat this as a temporary measure unless the corrosion is very minor. Once rust has eaten from the inside out, new leaks can appear nearby. Sometimes homeowners feel frustrated because they “fixed” one hole only to discover another after the next rain. That is not bad repair technique, it is usually a sign the gutter has reached the end of its serviceable life.
When the problem is really sagging, not leaking
A lot of water problems around gutters come from sagging sections. The leak you notice at a joint may be happening because water pools there day after day. If the run dips between hangers or pulls away from the fascia, resealing alone will not last.
Stand back and sight along the front edge of the gutter. It should follow a gentle, consistent slope toward the downspout. Most residential gutters do not need dramatic pitch, but they do need enough fall for water to move. A common target is roughly a quarter inch of slope for every ten feet of run, though conditions vary. Long runs, heavy tree debris, and roof valleys that dump high volumes of water may benefit from careful adjustment.
Loose spikes and ferrules on older systems are frequent offenders. They back out over time, especially in fascia that has softened from repeated wetting. Modern hidden hangers with screws hold better, but only if the wood behind them is sound. If a fastener spins without biting, check for decay before assuming a larger screw will solve it. Rotten fascia does not become reliable because you used a bigger fastener.
Re-supporting a section often stops recurring seam leaks because it removes the standing-water condition that caused them. It is one of those repairs that seems indirect, but it addresses the actual stress.
Downspout connections and outlets
Leaks around the downspout outlet can soak a wall surprisingly fast. These spots handle concentrated flow, and if the connection loosens or clogs, water backs up around the opening.
Look inside the gutter where the outlet attaches. If sealant has cracked around the flange, clean and reseal it. Check that the downspout itself is not clogged lower down. I have seen outlet leaks “repaired” several times when the real issue was a buried elbow full of maple seeds. Water could not exit quickly enough, so it rose and escaped at the joint.
If the outlet opening is too small for the roof area feeding it, no amount of sealant will fully cure overflow during heavy rain. That is more of a design issue than a repair issue. One downspout added in the right place can do more than multiple rounds of patching.
A word about sealants, because product choice matters
Not all exterior caulks belong in a gutter. Some shrink noticeably, some lose adhesion under prolonged wet conditions, and some turn brittle after a season of ultraviolet exposure. A gutter lives in a harsh cycle of sun, water, debris, and movement. Use a product that is meant for that environment.
I have had the best long-term results with high-quality gutter or flashing sealants that remain flexible. Flexibility matters because gutters move. Rigid products tend to split at the bond line. Silicone can work in certain applications, but some silicones are difficult to recoat or patch later, and they do not always adhere well to dirty oxidized metal unless the prep is perfect. A purpose-made gutter sealant is generally the safer choice for most homeowners.
Also, more sealant is not always better. Thick blobs trap debris and can divert water under the edge https://gunnerrxev617.tearosediner.net/gutter-repair-for-rusted-sections-fix-or-replace of a repair. What you want is full contact, clean tooling, and enough coverage to bridge the vulnerable area without creating a ridge that catches sediment.
Safety deserves more respect than it gets
Most gutter repairs happen from a ladder, usually while leaning awkwardly at roofline height. That alone makes the work more dangerous than the materials involved suggest. If the ground is soft, sloped, or uneven, the repair should wait until the ladder can be set safely. Wet decking, overhead service lines, and second-story eaves add real risk.
One mistake I see often is overreaching to avoid repositioning the ladder. That is how gutters get bent and people get hurt. Move the ladder as many times as needed. It is slower, but not nearly as slow as a hospital visit or a torn section of gutter ripped from the fascia.
If the leak is on a high or difficult roofline, or if the fascia itself seems compromised, bringing in a professional is not overcautious. It is good judgment.
Signs you should call a professional instead of patching it yourself
Some repairs look simple until you are up close. A seam leak may be tied to roof-edge flashing. A sagging run may reveal rotten trim. Water near the foundation might involve drainage grading, not just the gutter. There is no prize for forcing a do-it-yourself repair past the point where it makes sense.
Professional help is usually warranted when the leaks are widespread, the gutter is mounted two stories up, the fascia shows softness or staining, or the system keeps overflowing despite being clean and sealed. The same goes for copper gutters, which require different repair methods and material compatibility than standard aluminum systems.
A good contractor will not just patch the visible hole. They will look at pitch, support spacing, outlet capacity, flashing, and where the discharged water ends up. That broader view is often what separates a real fix from another temporary stopgap.
Keeping repaired gutters from leaking again
Once a repair is done, the best next move is prevention. Most leaks worsen because gutters stay full of decaying organic matter, hold standing water, or endure repeated freeze-thaw stress around blocked sections. Clean gutters at least once or twice a year, more often if you have overhanging trees. During that cleaning, take thirty extra seconds at each seam and end cap. Fresh staining, black lines, and trapped grit often reveal a failing joint before an active drip appears.
Watch how water exits at the downspouts during a normal rain. A healthy system should move water smoothly without backing up at the outlet or spilling from the front lip. If you notice splash marks below one section every storm, that is a clue worth following before damage spreads.
It also helps to check the fascia from the ground after a heavy rain. Dark wet lines behind the gutter, peeling paint, or mildew under one corner often point to hidden bypassing. Homeowners who catch that early usually spend a few dollars on sealant. Those who miss it for a season may end up replacing trim, soffit, and part of the gutter run.
The repairs that last are the ones done for the right reason
A good gutter repair is rarely glamorous. It is usually a matter of cleaning out years of grit, tracing water carefully, correcting a support issue, and then sealing or patching with discipline. Done right, it can buy many more years from an otherwise sound gutter system. Done hastily, it becomes one more layer of mess the next person has to scrape away.
If you take anything from this, let it be this practical rule: repair the cause, not just the drip. A seam that leaks because it is dirty and dried out wants one kind of fix. A seam that leaks because the run has sagged and holds water wants another. That distinction is what keeps a minor maintenance chore from becoming siding damage, fascia rot, or a wet basement problem a few storms later.
For most homeowners, early attention is the cheapest form of gutter repair there is.
Just Gutters LLC
262 Main St
Hackettstown, NJ 07840, United States
Phone: +1 201-331-9454
FAQ About Gutter Repair
Is it cheaper to repair or replace gutters?
Repair can cost less when damage is limited and the remaining system is sound. Replacement may offer better value when leaks, corrosion, or repeated failures affect several sections. An inspection and written estimate can help compare the options.
Can damaged gutters be repaired?
Many localized problems, including leaking joints, loose brackets, sagging sections, and damaged downspout connections, can be repaired. The best approach depends on the material, extent of damage, and condition of the mounting surface.
Can I repair gutters myself?
Simple ground-level checks may help identify a problem, but roof-edge work carries fall risks and may require specialized tools. Professional assessment is advisable for high gutters, loose sections, hidden wood damage, or uncertain drainage problems.